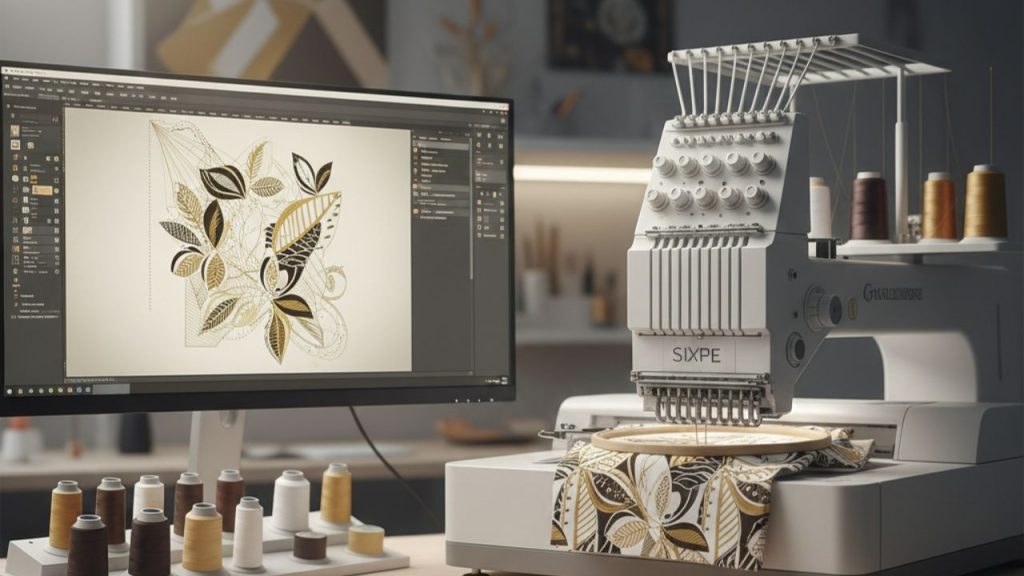
Metallic threads can turn a simple embroidery project into something truly eye-catching. Their reflective surface adds sparkle, depth, and a touch of comfort to any design, making them perfect for festive patterns, decorative borders, and standout details. However, while they look beautiful, metallic threads can be a little more challenging to work with compared to regular embroidery floss.
For beginners, the key is understanding how these threads behave and learning the right techniques to manage them.
What Makes Metallic Threads Special
Metallic threads are different from normal embroidery threads because they have a shiny coating that makes them sparkle. This shine can make your designs look special. They are often used for festive designs, borders, or small details that you want to stand out.
However, because of the shiny coating, metallic threads can be a bit stiff and less flexible. This means they can twist, fray, or break more easily if not handled carefully. Knowing how they behave will help you avoid problems and enjoy using them in your embroidery.
Picking the Right Metallic Thread
There are many types of metallic threads, such as smooth, braided, or even ones with holographic effects. For beginners, smooth metallic threads are the easiest to start with because they tangle less and are easier to guide through fabric.
It’s also a good idea to choose good-quality threads from trusted brands. Cheaper threads may look nice at first, but can break or lose their shine quickly. Starting with a small project will help you test the thread and see if it works well for you.
Choosing the Best Needle
Metallic threads need a needle with a bigger and smoother eye so the thread can pass through without damage. Special metallic needles or embroidery needles are great choices because they reduce friction. Using the right needle helps the metallic thread move smoothly through the fabric, making stitching easier and keeping the shine intact.
Getting Your Thread Ready
Metallic threads work best when cut into shorter lengths, around 12–18 inches. Shorter threads are easier to control and are less likely to tangle or fray while stitching. Before you start, you can also gently run the thread between your fingers to smooth it out. Some people like to use thread conditioner or beeswax to help reduce friction and keep the thread in good condition while working.
Preparing Your Fabric
Metallic threads can be a little heavy, so using a firm fabric like linen or cotton can help keep your stitches neat. Lightweight fabrics may stretch or wrinkle, so it’s good to use a stabilizer underneath for support.
Using an embroidery hoop or frame will keep your fabric tight and make it easier to control the thread. This prevents puckering and keeps the design looking clean and professional.
Mixing Metallic Threads with Normal Threads
You don’t have to use metallic threads for the whole design. They look great when used with regular cotton embroidery floss. For example, you can use metallics for outlines, highlights, or small decorative details.
Mixing them with normal threads can make your design look more balanced. The shine of the metallic thread stands out even more against the matte finish of regular floss.
Avoiding Common Problems
A common mistake is using metallic thread that is too long, which can cause tangling and fraying. Always work with shorter pieces for better control. Mistakes to avoid:
- Using a thread that’s too long causes tangles.
- Skipping the right needle for metallics.
- Not adding a stabilizer to thin fabrics.
- Pulling the thread too tightly.
- Stitching too fast and causing frays.
- Ignoring test stitches before starting.
Keeping these tips in mind will make stitching smoother and give your design a neat, shiny finish.
How Impact Digitizing Can Help You?
A well-prepared embroidery file makes a big difference when working with tricky materials or special threads like metallics.
With the right design adjustments, your stitches stay neat, and the final piece looks polished. Impact Digitizing can create files that suit your fabric, thread type, and design style, helping you get clean results with less trial and error.
Conclusion
Embroidering with metallic threads might require more patience and a few extra steps, but the results are worth every minute. Once you get the hang of it, you’ll be able to create designs that stand out with shimmering highlights and beautiful texture. Start small, practice on scrap fabric, and don’t be afraid to experiment with combining metallics and regular threads for unique effects.
FAQs
1. Why are Metallic Threads Harder to Work With?
A: Metallic threads have a shiny outer coating that makes them less flexible and more prone to fraying or tangling. This coating can catch on the fabric or needle if you’re not careful, which is why using shorter lengths and stitching slowly is recommended.
2. What Kind of Needle Should I Use With Metallic Threads?
A: A needle with a larger, smooth eye, such as a metallic needle or an embroidery needle, is best. It allows the thread to pass through easily and reduces friction, helping prevent breakage.
3. Can Metallic Threads Be Used for All Types of Embroidery Stitches?
A: Yes, but they work best for accents and decorative elements rather than filling large areas. Using them for smaller details helps maintain their shine and avoids too much wear on the thread.
4. How Can I Keep Metallic Thread from Fraying?
A: Cut shorter lengths (about 12–18 inches), avoid pulling the thread too tightly, and let your needle dangle every so often to untwist the thread. You can also use a thread conditioner to make stitching smoother.